Gurtaj's blog!
Why fastai?
I wanted to get into machine learning, and I had heard that TensorFlow and PyTorch were topdogs in the game so I decided to do some research on YouTube to find comparisons of the two, in order to try and deduce which would be better. After some time I decided that a fastai & PyTorch stack would be best for me as it would be:
- A relatively short learning curve.
- fastai holds a lot of the necessary functionality and is very high-level meaning in depth knowledge is not required, for many use cases.
- fastai have a free online course that looks to be very comprehensive.
- Seems likely to remain as relevant knowledge in the foreseeable future.
Following the Course CNN Example
Some key things to note before starting
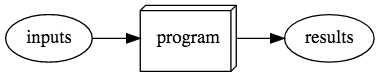
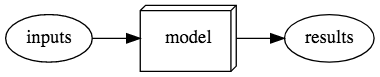
The course first takes us through the differences/similarities between a program and a neural network model; in short once a model is trained it can be treated just like a program.
It also tells us some key things to be aware of when training models:
Avoid overfitting:
This is where the model gets really good at predicting the dataset that you have provided for training but is no good for data outside that set:

It has memorised the training set rather than trying to find generalisable underlying patterns in the data.
This is why, in our data, we must make sure that we have a validation set as well as a training set.
We should also ensure that our validation set is always the same so that our model never has a chance to memorise the labels on that set of data.
We can then see if our model is overfitting by comparing our chose metric(s) on the training data to the metric(s) on the validation data.
My First CNN
The first neural network architecture we dive into is CNNs (convolutional neural networks) which are good for performing tasks on images, or any type of data that have meaning when converted to images (like sounds, time series’, or even malware binary files).
fastai have a github repo that contains all the jupyter files needed in order to interact with the course examples and try things out.
We are walked through an example of making a bear classifier and all the methods described are exactly what i used for my icon classifier, so here goes..
First is the process of gathering data, the course recommends a bing image search method but this seemed like a lot more effort than i was willing to put into it just because it was free (creating an account and using the given key etc.). With a quick bit of googling i was able to find jmd_imagescraper which uses DuckDuckGo for scraping images:
!pip install jmd_imagescraper
from jmd_imagescraper.core import * # don't worry, it's designed to work with import *
I found this to be so satisfactory that now, even instead of Googling things, i just Duck it!
Initially my icons of choice were Drake, Snoop Dogg, and Beyonce. I figured they’re all famous enough to have all first 150 image results actually be them. meaning the scraped data would be labelled correctly:
icon_types = 'beyonce','snoop dogg','drake'
# use line below if already have path directory need to delete its' existing contents
# shutil.rmtree(path)
path = Path('icons')
for o in icon_types:
    results = duckduckgo_search(path, f'{o}', f'{o}', max_results=150)
Out of the results we get, all may not be images (or some of the files may be corrupted), luckily fastai has a couple of functions, get_image_files and verify_images, that we can use to detect these and then remove them from our data:
fns = get_image_files(path)
failed = verify_images(fns)
failed.map(Path.unlink);
Before we create our model we have to tell fastai what kind of data we have, and how its’ structured. We can do this by using the DataBlock api:
icons = DataBlock(
    blocks=(ImageBlock, CategoryBlock),
    get_items=get_image_files,
    splitter=RandomSplitter(valid_pct=0.2, seed=42),
    get_y=parent_label,
    item_tfms=RandomResizedCrop(224, min_scale=0.5),
		batch_tfms=aug_transforms())
Here, we are telling fastai:
-
What our input data/independent variable is (
ImageBlock) and what our label data/dependent variable is (CategoryBlock):blocks=(ImageBlock, CategoryBlock) -
How to get the list of items (in this case filenames):
get_items=get_image_files -
How to split our data into a training set and a validation set:
splitter=RandomSplitter(valid_pct=0.2, seed=42)- This code creates a validation set from 20% of the data.
- It also fixes the random seed, meaning that every time we run this, the validation set will be the same.
-
How to label our data:
get_y=parent_labelparent_labelis a function gets the name of the parent folder of each image and uses that as the label (icons/drake/00000023.jpgwould use ‘drake’).
-
In what way to transform each item in our data:
item_tfms=RandomResizedCrop(224, min_scale=0.5)-
RandomResizedCropselects a random part of each image and then crops to just that part. On each epoch it will randomly select a different part of the image.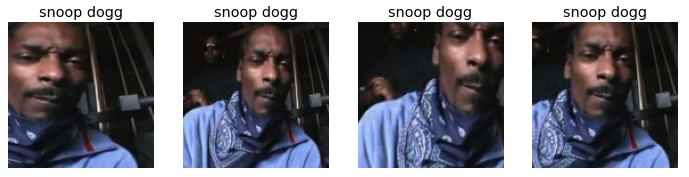
- This allows the image to focus on and recognise different features in the images.
- It also reflects how images work in the real world; different photos of the same thing can be framed in slightly different ways.
-
-
What, if any, data augmentation we want to apply:
batch_tfms=aug_transforms()batch_tfmsis likeitem_tfmsbut it applies its function to a batch of data, at a time, using the GPU.-
aug_transformscreates random variations of our input data, such that they appear different but do not change the meaning of the data.’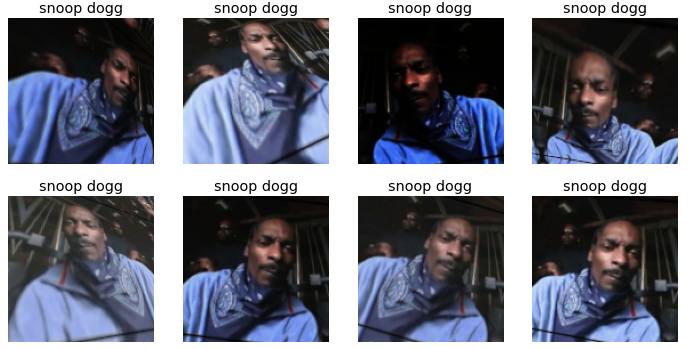
- Common data augmentations include:
- Rotation
- Flipping
- Perspective warping
- Brigness changes
- Contrast changes
- Common data augmentations include:
The DataBlock is then used, like a template, for creating our DataLoaders. We also still need to tell fastai the source of our data, in this case path:
dls = icons.dataloaders(path)
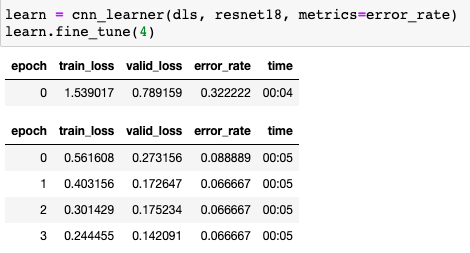
Now that I had created my DataLoaders it was time to train my icon classifier. We create our Learner and fine tune it.
learn = cnn_learner(dls, resnet18, metrics=error_rate)
learn.fine_tune(4)
Here I have told fastai to create a convolutional neural network (CNN).
- By default this applies a pretrained model,
cnn_learner(this has weights have already been trained on a thousand different categories across 1.3 million photos). - We pass it our DataLoaders,
dls. - We tell it what architecture we want it to use,
resnet18(the ‘18’ indicates the number of layers in our network). - We declare what metrics we want to use in order to assess the performance of the model as we are training it,
error_rate.- This is a function provided by fastai that tells us the percentage of images in the validation set that are being classified incorrectly.
-
I then ran
fine_tuneon the model for 4 epochs.- We use
fine_tunerather thanfitbecause we are using a pretrained model here and do not want to throw away all of its’ current capabilities.
- We use
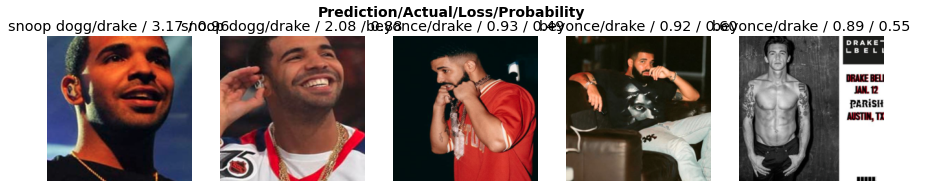
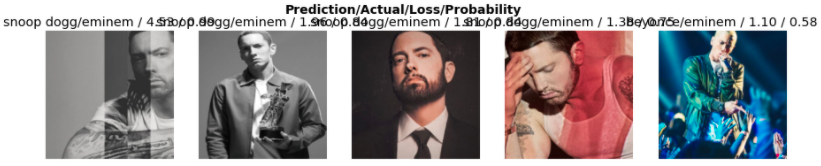
fastai also has a way of plotting the top losses of a trained network interp.plot_top_losses. It also has an ImageClassifierCleaner() tool. The latter is a GUI that allows us to go through the data in order of highest to lowest loss. When i went through the data that was labelled as Drake i saw that there was a high number of images that were not the singer Drake but other well known Drake’s who were sports players, random drakes i had no awareness of, and also Nathan Drake, the video game character from Uncharted:
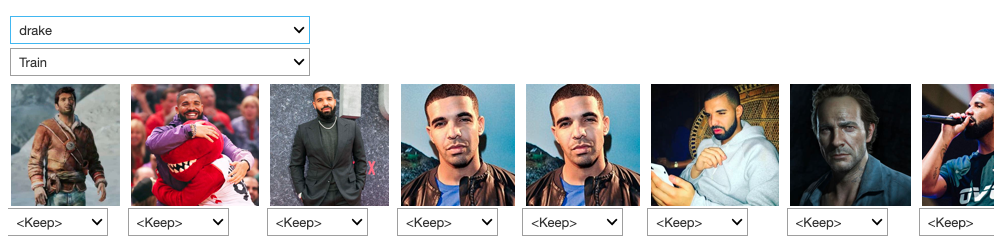
One of these imposter Drakes was even confused to be Beyoncé somehow:
I figured i should switch Drake for another well known celebrity with a more unique name. So instead i went with Eminem, in retrospect he probably should have been my first choice all along!
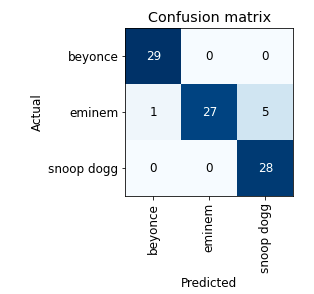
Another handy visual tool that is provided by fastai is interp.plot_confusion_matrix. It is a visual representation of what the model predicts vs what the real truth is (calculated using the validation set):
Once i had trained this model with the new choice of famous icons, it was time to turn it into a a demo-able online application. We use fastai’s learn.export() which saves both the architecture and the trained parameters of our model. We can now use this exported model wherever we want our app to exist.
Since i do not expect this model to be used on much more than one pic at a time i figured i no longer need to utilise a GPU and therefore can run the app on my local machine and do it all on a CPU instead.
Running jupyter notebook Locally
Jupyter was all still very new to me and i had only ever used it on cloud services. After a quick bit of ducking i found that vscode already has an extension to run jupyter notebooks locally. This seemed like my most approachable entry into running things on my machine since I was already a vscode user anyway.
I simply installed Microsoft’s Jupyter and Python extensions for vscode and i was ready to go!
TURNS OUT there is a bug associated with using an upload button from ipywidgets which is needed for this app, at the time of me trying to do this, vscode were aware of the issue but had ‘no plans to fix’ it:

For this reason i had to ditch using vscode and opt to just run jupyter notebook from my CLI (command line interface) manually.
I downloaded and installed the latest python version (python 3.9). I then downloaded and installed pip, the package management system used to install and manage software packages/libraries written in Python.
My first code block in the notebook was used to install fastbook and ipywidgets. ipywidgets is what provides the GUI components that will be utilised for the app. I then continued to import all the necessary libraries.
!pip install ipywidgets
!conda install fastbook
pip is very useful and I was able to install ipywidgets with it just fine. I used anaconda (conda) to install fastbook (note the use of ! is only used when writing lines of codes from within a notebook, that you want to actually be executed from the terminal).
Installing jupyter proved to be very troublesome, i went through many guided examples online that all used pip so i know it is possible, but for whatever reason, the setup i had on my machine just wasn’t allowing for it. I actually spent around 3 days trying different methods. Finally, I followed jupyter’s steps for using anaconda instead. This actually worked straight away with no hiccups, so in retrospect i should have just done it this way from the start.
With everything installed I imported all the libraries needed by my notebook:
import fastbook
fastbook.setup_book()
from fastbook import *
from pathlib import Path
from IPython.display import display
import ipywidgets as widgets
Now I could import my model and begin using it!
path = Path()
learn_inf = load_learner(path/'export.pkl')
First I downloaded the export.pkl file of the trained model, from the cloud notebook so that I could access it in my local repo.
It was then imported using learn_inf = load_learner(path/'export.pkl').
I needed to create two buttons
- one for users to upload an image,
- and the other to begin classifying the uploaded image.
btn_upload = widgets.FileUpload()
out_pl = widgets.Output()
lbl_pred = widgets.Label()
btn_run = widgets.Button(description='Classify Icon')
- The upload button was created with
btn_upload = widgets.FileUpload(). - I created an output placeholder using
out_pl = widgets.Output(). This is used to display a 128 by 128 pixel thumb of the uploaded image. - I also made a prediction-label placeholder using
lbl_pred = widgets.Label(). - Finally the classify button was created with
btn_run = widgets.Button(description='Classify Icon').
Now we define the actual function that will run when we click the classify button (the upload button already has the upload functionality built in):
def on_click_classify(change):
	img = PILImage.create(btn_upload.data[-1])
	out_pl.clear_output()
	with out_pl: display(img.to_thumb(128, 128))
	pred, pred_idx, probs = learn_inf.predict(img)
	lbl_pred.value = f'Prediction: {pred}; Probability: {probs[pred_idx]:.04f}'
- First we save the uploaded file to a variable
img. - We clear the output placeholder, just incase it was already populated from a previous run.
- We then display a thumb of the currently uploaded image in the output placeholder.
- now we actually call our model and extract from it, the data that we want to use in our output:
predgives the label predicted class e.g. ‘Eminem’.pred_idxgives us the index of that class within the list of all our classes,- So if our list is in the order [‘Snoop Dogg’, ‘Eminem’, ‘Beyonce’] (this order is known as the ‘‘vocab’), then the index of ‘Eminem’ is 1 (zero base index).
probsgives us a list of the probabilities for the input being each of the categories we asked the model to classify between.
This function can now be attached to our classify button:
btn_run.on_click(on_click_classify)
So now we have made all our GUI components and attached functionality to them, but we haven’t actually told our notebook to display them yet. We can do this with VBox:
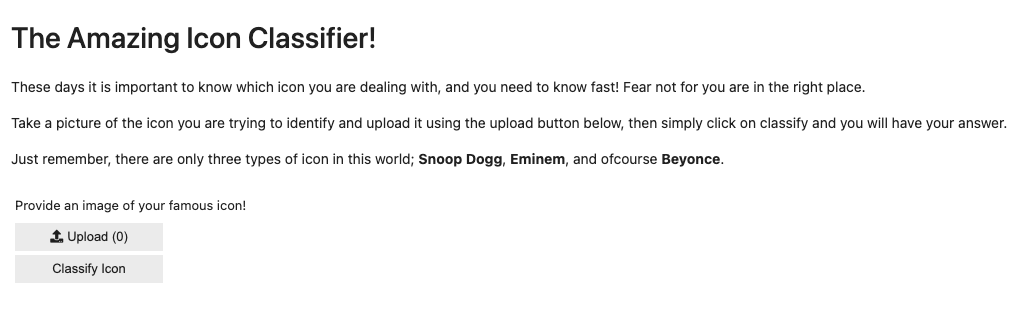
widgets.VBox([widgets.Label('Provide an image of your famous icon!'), btn_upload, btn_run, out_pl, lbl_pred])
Running this code displays all the GUI elements passed to it. Notice how the first thing passed is a label that provides a bit of instruction to the user widgets.Label('Provide an image of your famous icon!').
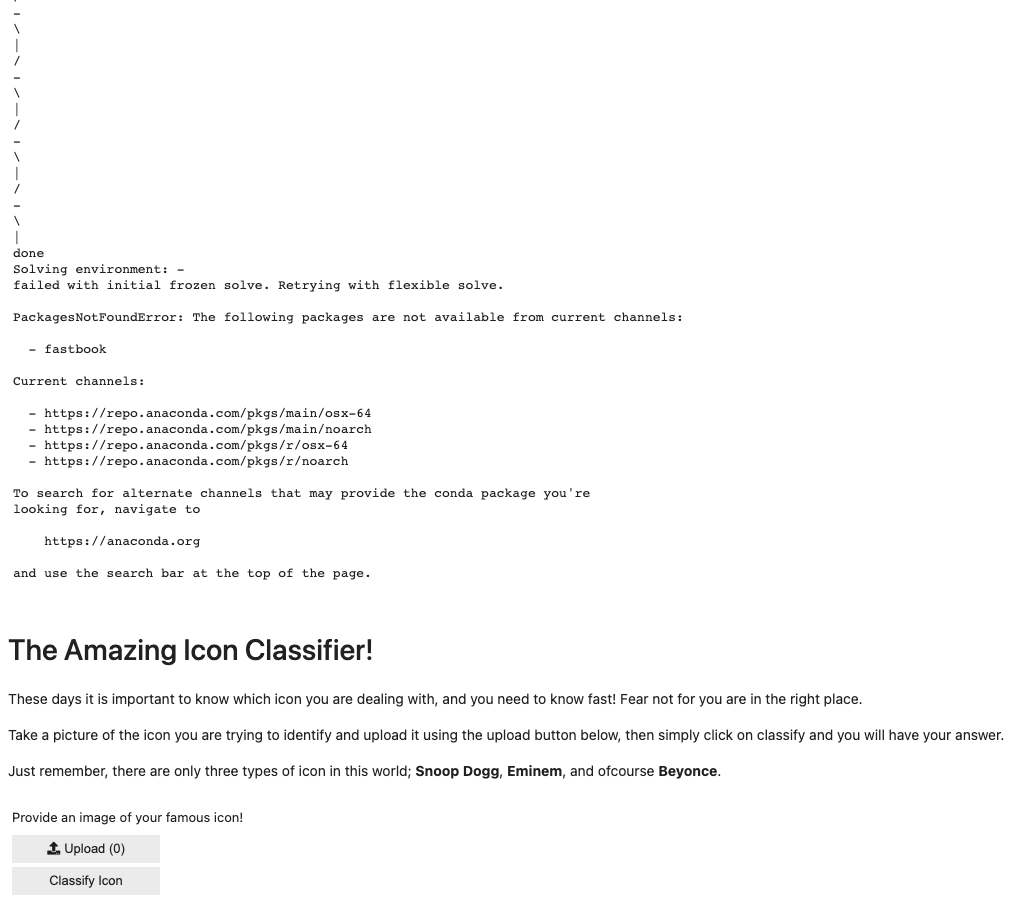
I also added a markdown cell above the GUI components to add a bit of a descriptive introduction of the model, for users.
Running Demo’s on Local Machine
Once we have jupyter notebook running it is actually very easy to access voila. All we need to do is go to the /voila route of the url that is served by jupyter. So something like http::/localhost:8888/tree for our jupyter notebook tree, would become http::/localhost:8888/voila for our voila tree, for example.
The notebook tree looks something like this:
And the voila tree looks something like this:

The voila instance of my notebook looked like this at first:
Notice the installation code displaying at the top. Clearly this is of no importance to the user and should be hidden. I did a little ducking on how to hide certain outputs from appearing in voila but i didn’t see anything that looked very promising. I decided to just try and comment out the installation code in my notebook:
# !pip install ipywidgets
# !conda install fastbook
Then when i ran the app it looked like this:
All the things, and only the things, that i want to appear to a user.
I can only assume that this worked ok without the installation code still running because i had already had the relevant packages installed locally and therefore did not need to re-install them whenever running the notebook. This left me wondering how i can achieve this same clean output when I deploy the notebook. I detail how this is done in the deployment section.
After getting voila to work locally, I was ready to deploy it to somewhere remote so that people can access it from anywhere.
Deployment of my Model
The fastai course videos and book recommend a site called Binder for this so I gave it a go but was unsuccessful after several attempts. I found other people online had similar issues as me so, as the the fastai book had instructed, for more up to date information i should refer to the course website. On here i found guidelines on how to use heroku for deployment and I followed the steps.
Just as with Binder, I had to ensure that I had my notebook in a GitHub repository.
I also learnt that I needed a requirements.txt file in this repo; to list all the packages that are required for my notebook to run:
http://download.pytorch.org/whl/cpu/torch-1.7.1%2Bcpu-cp39-cp39-linux_x86_64.whl
http://download.pytorch.org/whl/cpu/torchvision-0.9.0%2Bcpu-cp39-cp39-linux_x86_64.whl
fastai
voila
ipywidgets
fastbook
Notice the pytorch wheel url’s at the top, it took a bit of ducking to figure out which exact versions of torch and torchvision were required for the version of python that i was using (3.9) but eventually, after several deployment attempts and interpretation of heroku error messages, i had found that these were the correct ones.
Another file that i require in my repo was Procfile, the process file. This tells Heroku what kind of app to create:
web: voila --port=$PORT --no-browser --enable_nbextensions=True icon_classifier.ipynb
-
NOTE: If i had more than one notebook in my repo and wanted to host them all then you simply remove the notebook filename at the end so instead you have:
web: voila --port=$PORT --no-browser --enable_nbextensions=True -
In the one file instance, users are directed straight to the declared notebook. In the multi-file instance they are instead directed to a root folder that lists all the notebooks that they can then choose from.
And that was it!
I had officially made my first personally trained CNN model and deployed it online, ready to share with whomever I like.
EDIT (09/05/2023):
The model is no longer hosted on herokuapp (I assume due to my inactivity), but you can now find the same model, with a slightly different UI, here.